Updating eMote Firmware
From time to time, Samraksh will make new versions of the eMote software and firmware available. To use it, you will have to update eMote on your mote and then re-link your C# programs to use the new DLLs. In this section, we give you directions for updating eMote firmware.
First, make sure you’ve satisfied the prerequisites. You won’t need Visual Studio for this.
-
Download the eMote .NOW firmware and DLLs. Go to samraksh.com and choose Support => eMote .NOW Downloads. Choose the version you want and click on it to download the ZIP archive. When downloaded, unzip it into a location of your choice.
-
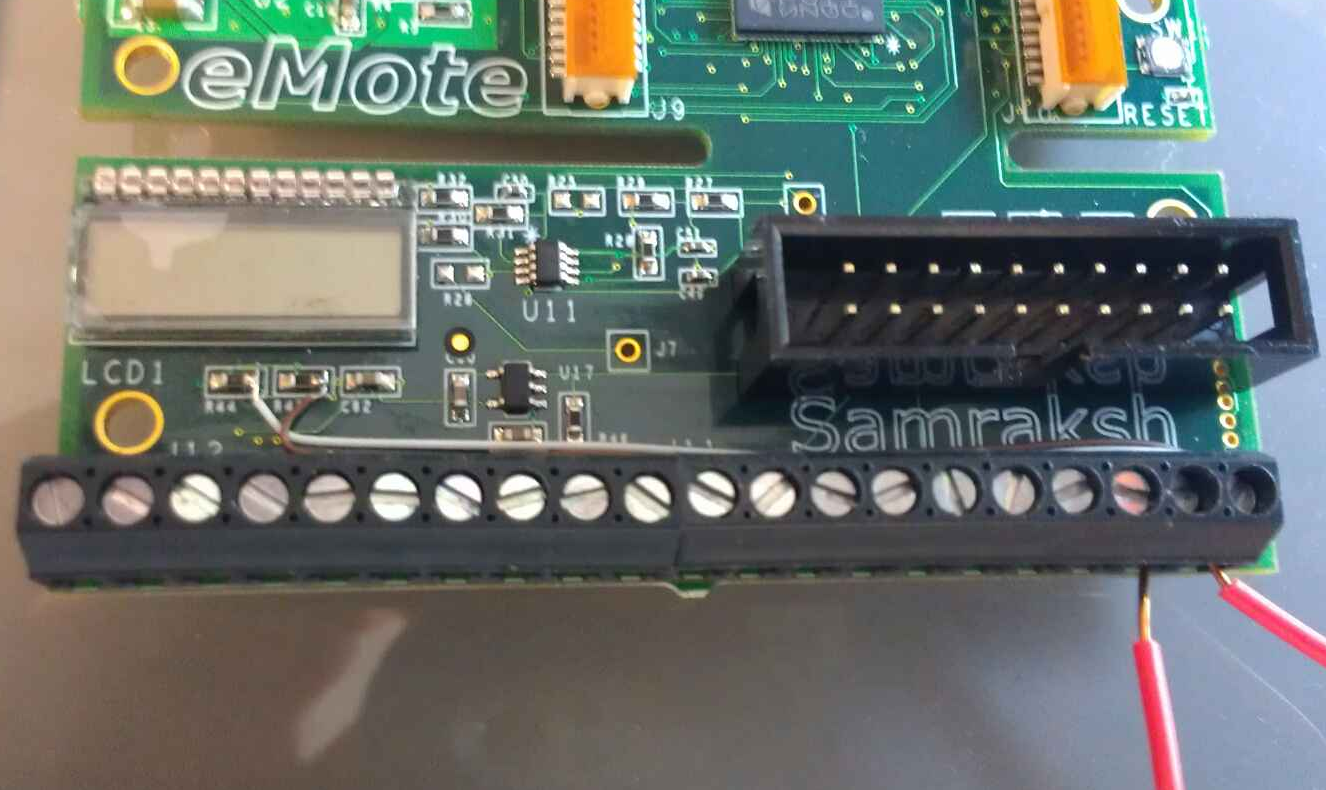
Jumper pins J11/9 and J11/10 as shown by the colored wire below (that's connector J11 pin 9 and J11 pin 10; see .NOW components). Note that connector J11 sits directly to the right of J12, without a gap between them. With the jumper connected, the .NOW will boot into TinyBooter instead of TinyCLR.
-
If there are any USB cables plugged into the .NOW board, remove them. This will power-down the board.
-
Plug a USB cable into the port shown, toward the top right of the .NOW board. Do not plug it into the port at the top of the board. Plug the other end into an available USB port on your PC. Usually it’s best to use a USB port on the PC since USB port replicators sometimes do not work correctly.
-
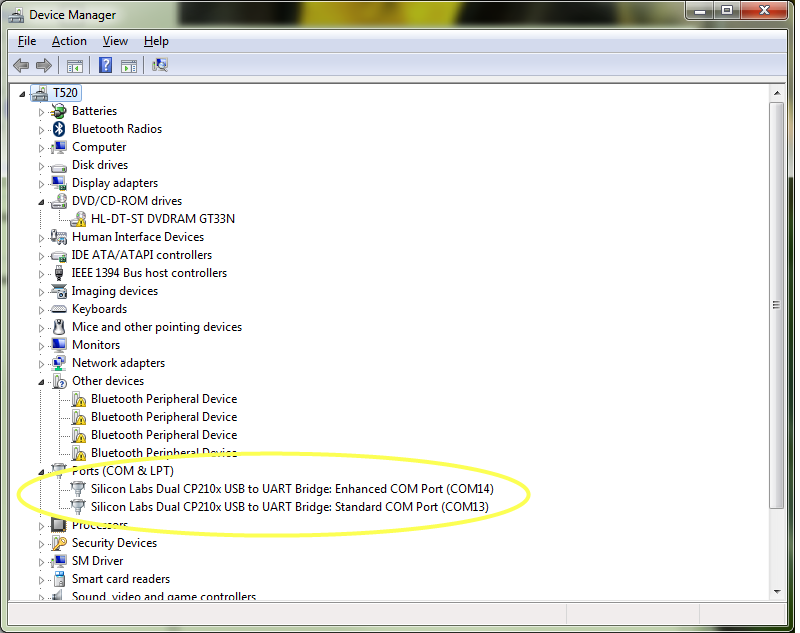
After you plug the mote in, you might get a message from Windows saying that it's installing driver software. Wait until that's finished. Then you can open up Device Manager from Control Panel. Expand Ports and you will see one or two com ports listed (depending on your particular eMote model. If you see just one, that's the com port to use. If you see two, use the one labeled "Standard"; COM13 in this case.
-
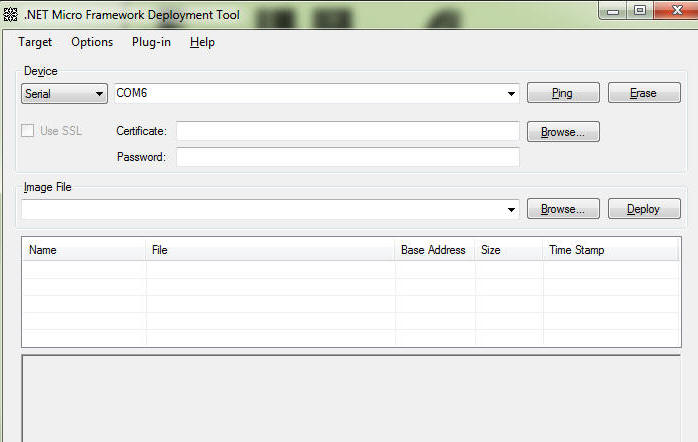
Start MF Deploy. Connect to the COM port assigned to the eMote. In the picture below, it is connected to COM6.
-
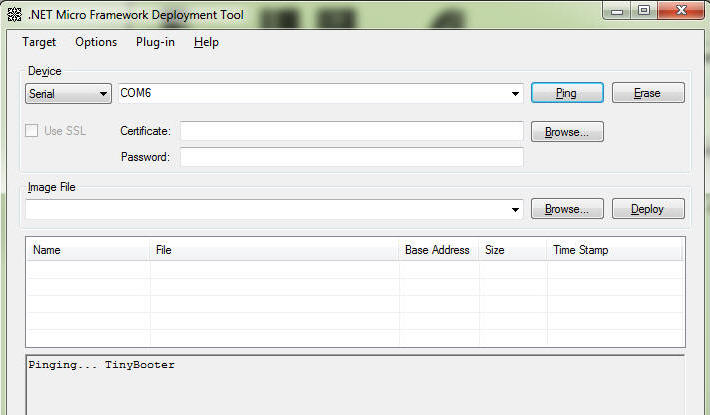
Click Ping. You should see TinyBooter.
-
In MFDeploy, click on Browse under Image File. Navigate to the location where you unzipped the firmware and DLLs. Open the folder "Samraksh Emote_TinyCLR.hex". Select the file named ER_FLASH). You may see other files present, but just ignore them. Click Open. You'll see the file listed below and you can click Deploy to flash them.
-
Disconnect the jumper between J11/9 and J11/10. Unplug the USB cable to remove power.
At this point you can plug the USB cable back in and begin using the eMote normally.